# How to setup and add Annoto Dashboard to NavBar
## Overview
This document shows how to add Annoto Dashboard to your D2L NavBar
> Annoto can be setup in Brightspace with LTI 1.3 dynamically or manually. It is recommended to use dynamic registration.
## Register the Tool
1. Click on the settings icon, then click on **Manage Extensibility.**
2. From the **LTI Advantage** tab, click **Register Tool.**
3. Choose **Dynamic,** enter the Annoto registration URL, check the checkbox to **Configure Deployment** and click **Register:**
* EU - [https://auth.eu.annoto.net/lti/register\_dashboard](< https://auth.eu.annoto.net/lti/register_dashboard>)
* US -[ https://auth.us.annoto.net/lti/register\_dashboard](https://auth.us.annoto.net/lti/register_dashboard)
4. Input the **clientID** and **Registration Key** provided by Annoto, and click **Register**:
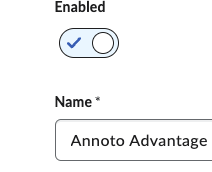
5. Please notice that by default the registration is Disabled. Click on the newly created registration, enable it scroll to the bottom and click on **Save**:
6. Click on **View Deployments** link
7. Open the newly created deployment.
> Note the deployment will have the same name as the registration.
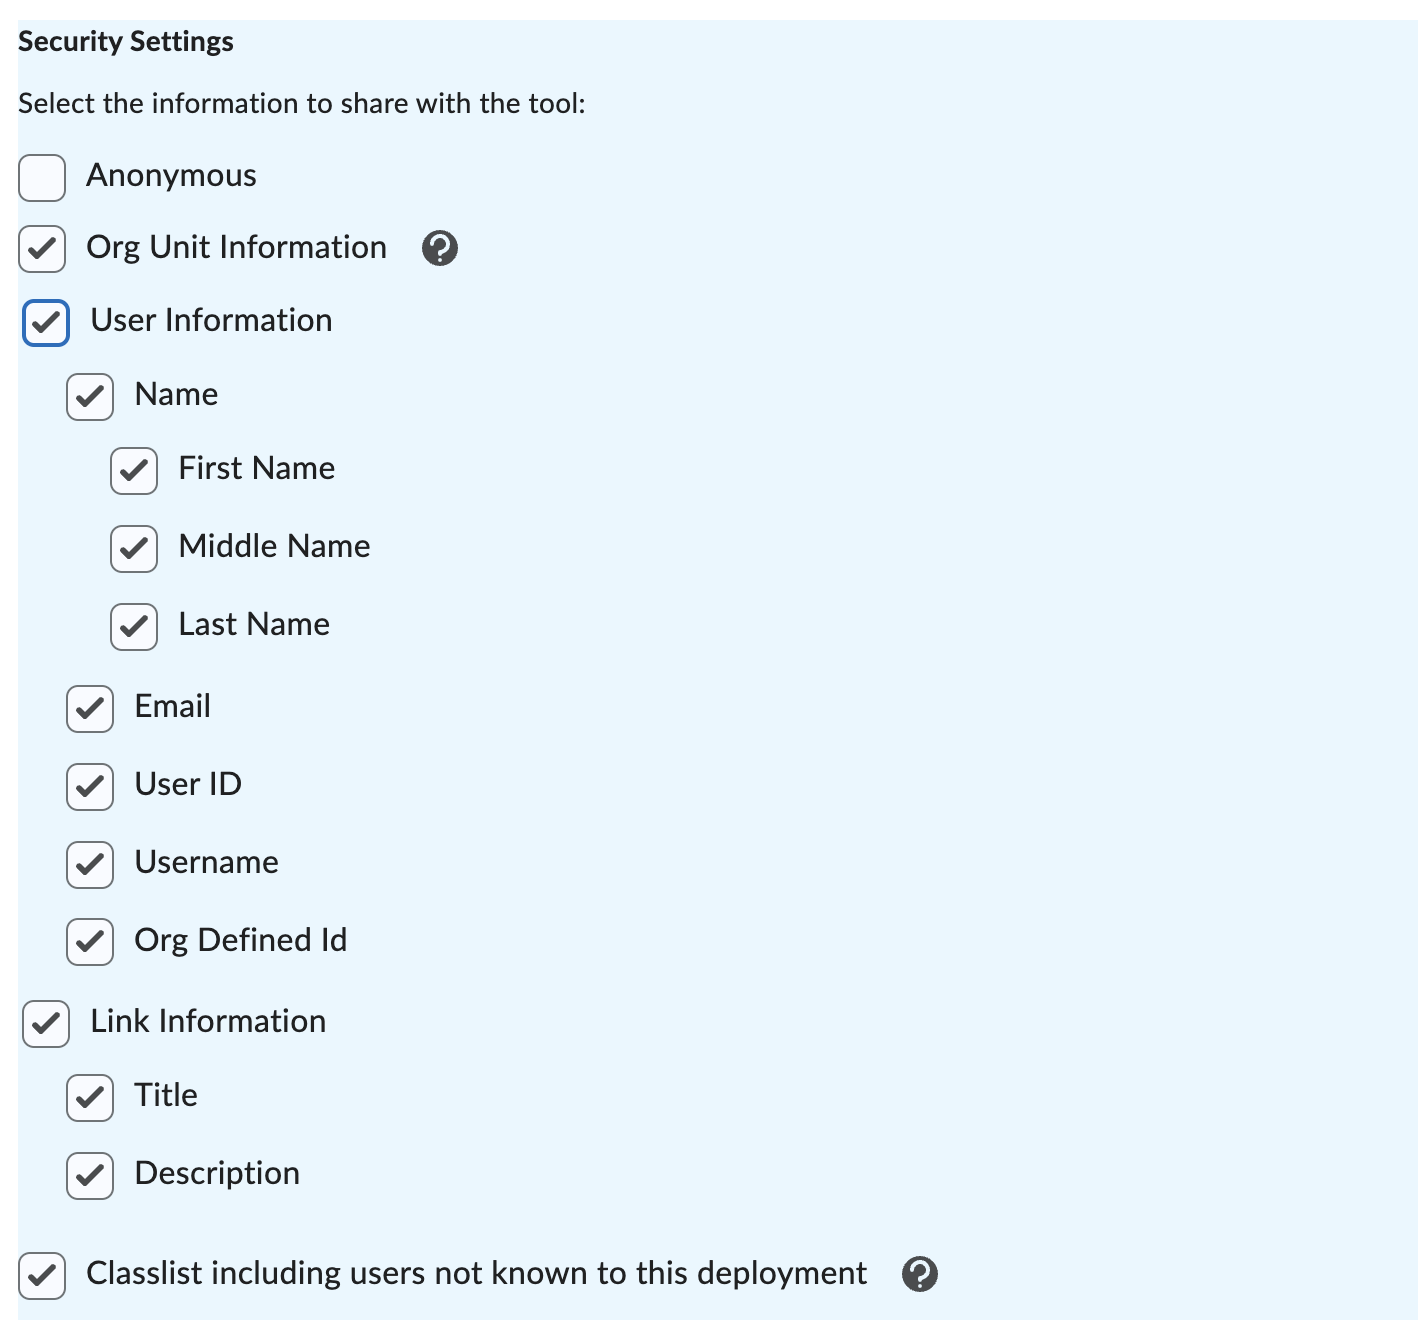
8. Scroll to the "**Security Settings**" section and make sure all checkboxes except "Anonymous" are enabled
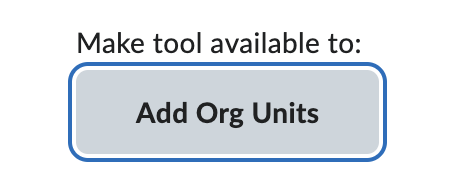
8. **Add Org Units** the too should be available to:
10. Click on **Save** and the Tool will be available for usage in the select Org units.
Annoto automatically adds 3 links which can be viewed by clicking on **View Links**:
## Adding Annoto to the Navbar
1. Adding the Annoto Course dashboard can be done either by the admin in the course template, or by the individual course admin
2. Hover over the navigation bar and click the three dots on the right (or pencil icon on the left).
3. Click **Edit This NavBar**
4. The Edit Navbar window is displayed.
5. Click **Add Links.**
5. Click **Create Custom Link**
6\. In the Create Custom Link window, enter **Annoto Course Dashboard** as the Name.
7\. Click **Insert Quicklink.**
8. Select **External Learning Tools.**
9. Select **Annoto Dashboard**.
10. The URL Quicklink is displayed:
10. Under **Behavior** choose **"Same Window"**
11. Under **Availability** make sure to choose course staff and exclude unauthorized roles (e.g. student)
12. Click **Create** and then **Add**
10. Click **Save and Close**
10. Annoto Course Dashboard should be now available in the NavBar
## Support
If you need any additional information or have any questions, please contact us at [Annoto Support](mailto:support@annoto.net?subject=Annoto%20Support)
## Last but not least
To learn more about Annoto’s dashboard and the insights provided by it, visit our [**Annoto’s Dashboard Guide**](https://app.gitbook.com/@annoto/s/guides/~/drafts/-Lz0r_gqCvScpkOrEOLm/annoto-dashboard/user-guide) page and the [**Dashboard’s Best Practices**](https://app.gitbook.com/@annoto/s/guides/~/drafts/-Lz1Xd7X_g-T2fmUKUZf/annoto-dashboard/best-practices).
\
---
# Agent Instructions: Querying This Documentation
If you need additional information that is not directly available in this page, you can query the documentation dynamically by asking a question.
Perform an HTTP GET request on the current page URL with the `ask` query parameter:
```
GET https://docs.annoto.net/setup-guides/brightspace/kaltura/how-to-setup-and-add-annoto-dashboard-to-navbar.md?ask=
```
The question should be specific, self-contained, and written in natural language.
The response will contain a direct answer to the question and relevant excerpts and sources from the documentation.
Use this mechanism when the answer is not explicitly present in the current page, you need clarification or additional context, or you want to retrieve related documentation sections.