This document details the steps required to install the Annoto Engagement Package for Moodle.
API Key (Client ID)
SSO secret
Registration Keys
Annoto Dashboard
Annoto Assignment
Annoto Moodle Local plug-in used to:
Load Annoto's in-video engagement widget for automatic detection and adjustment based on the player type running on the page.
Enable Annoto Activity Completion.
Annoto Assignment: Annoto's in-video engagement widget and allows for grading activities to sync with Moodle Gradebook.
Annoto Dashboard: Enables managing course activities and gaining actionable insights on learners and video content delivered.
Or see this interactive guide:
After the plugin is installed, Enter the API Key and SSO Secret.
Now click "Save" at the bottom of the settings page.
Note If you want to learn more about the plugin settings:
Login as Administrator
Enter: Site administration -> Plugins -> Activity modules -> External Tools -> Manage Tools.
In the text box labeled "Tool URL..." enter the specific link based on your deployment:
Click on "Add LTI Advantage"
Enter the API Key (Client ID) and Registration Key (Received for each tool)
Click "REGISTER"
Now the new Tool is added:
Click on the Edit icon
Change the "Tool configuration usage" type to "Show in activity chooser and as a preconfigured tool"
Repeat the steps 4-8 for Adding Annoto Assignment
In the text box labeled "Tool URL..." enter the specific link based on your deployment:
When seeing this message:
Click on "Register as a new external tool"
That's it!
To ensure you have the best possible experience while using Annoto, it is important to make a few specific adjustments to your media settings within Moodle.
By making these changes, you will enhance the functionality and overall performance of Annoto on your platform.
Here are the steps you need to follow in order to achieve an optimal experience with Annoto.
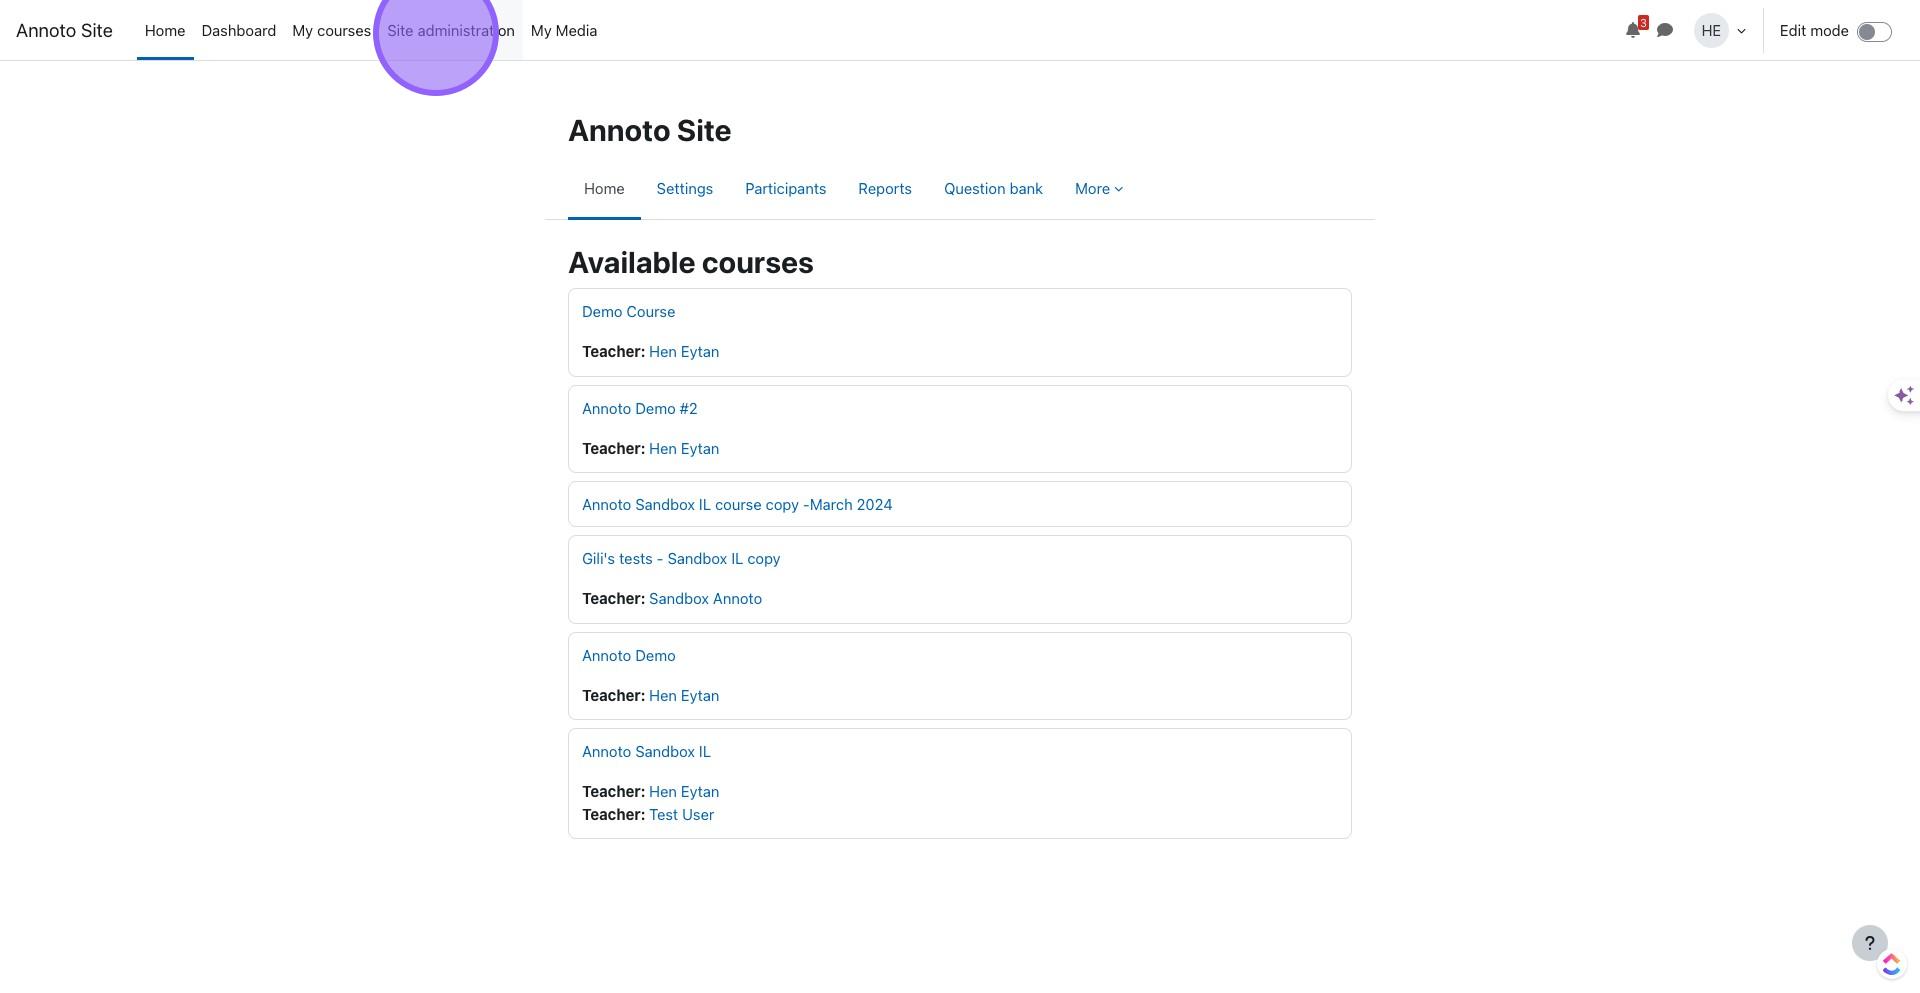
1. Click on "Site administration"
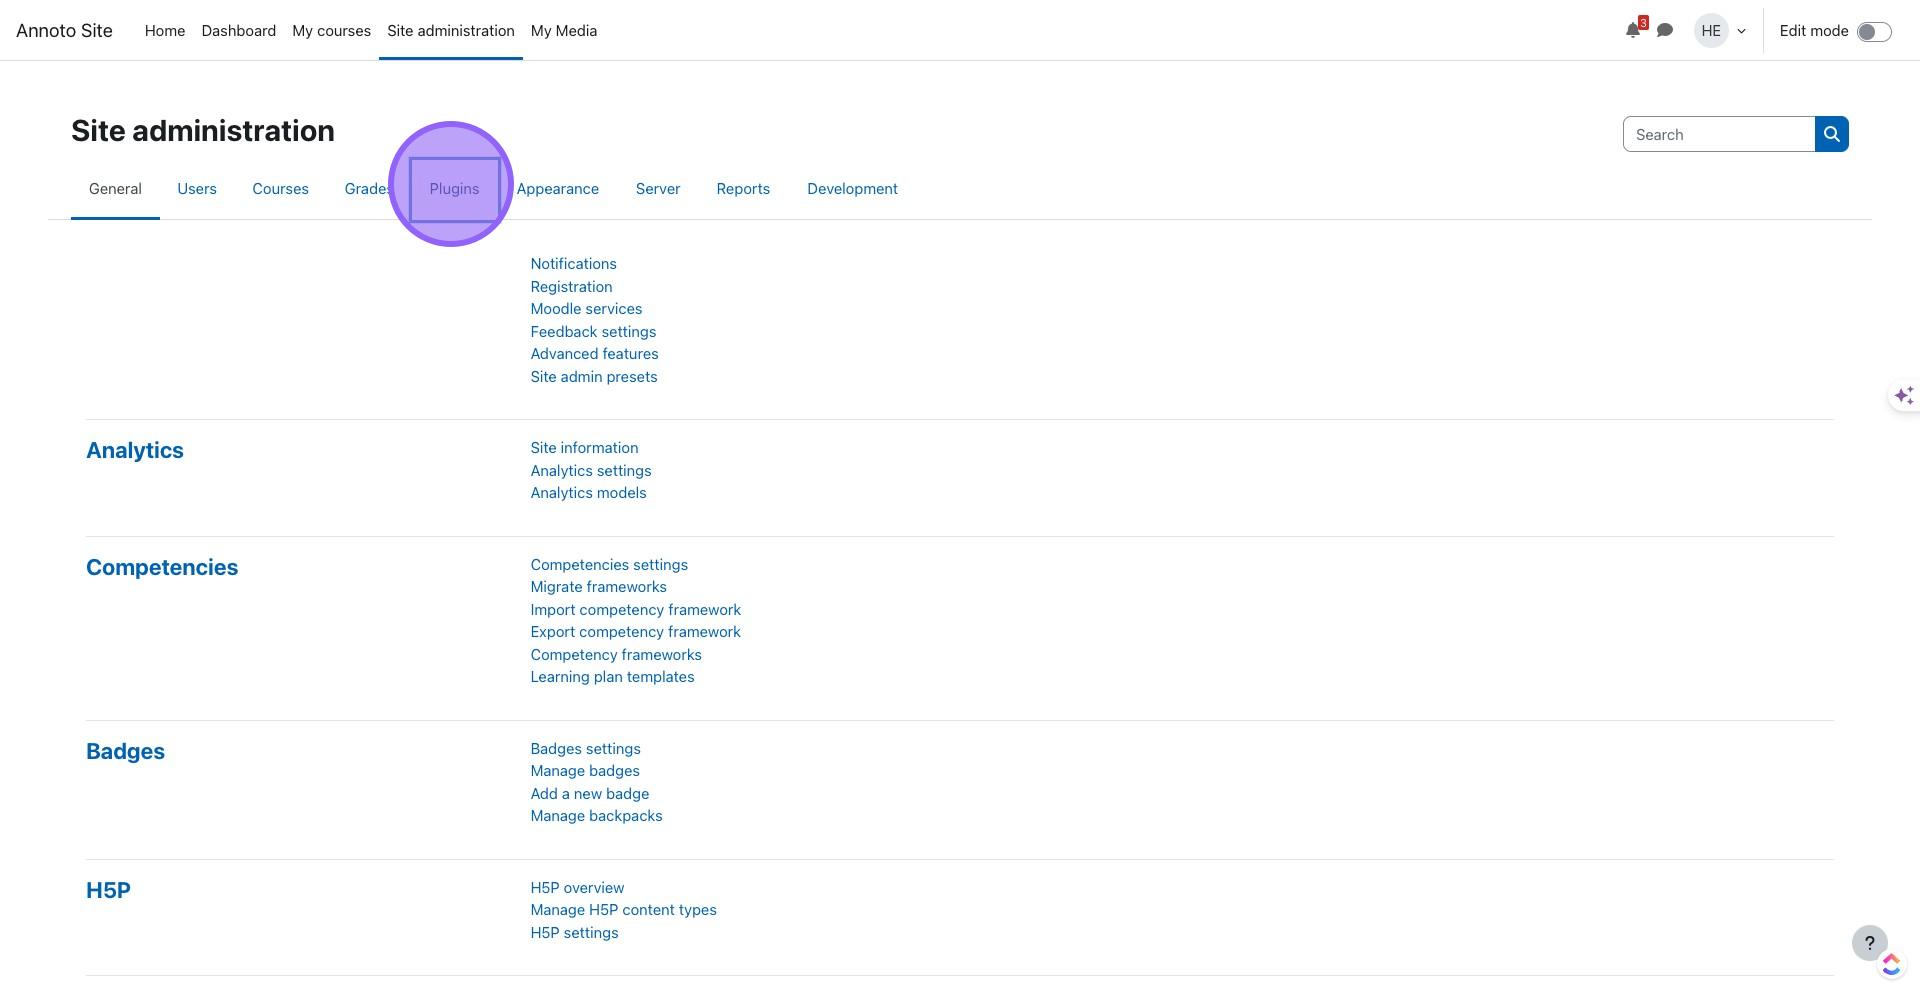
2. Click on "Plugins"
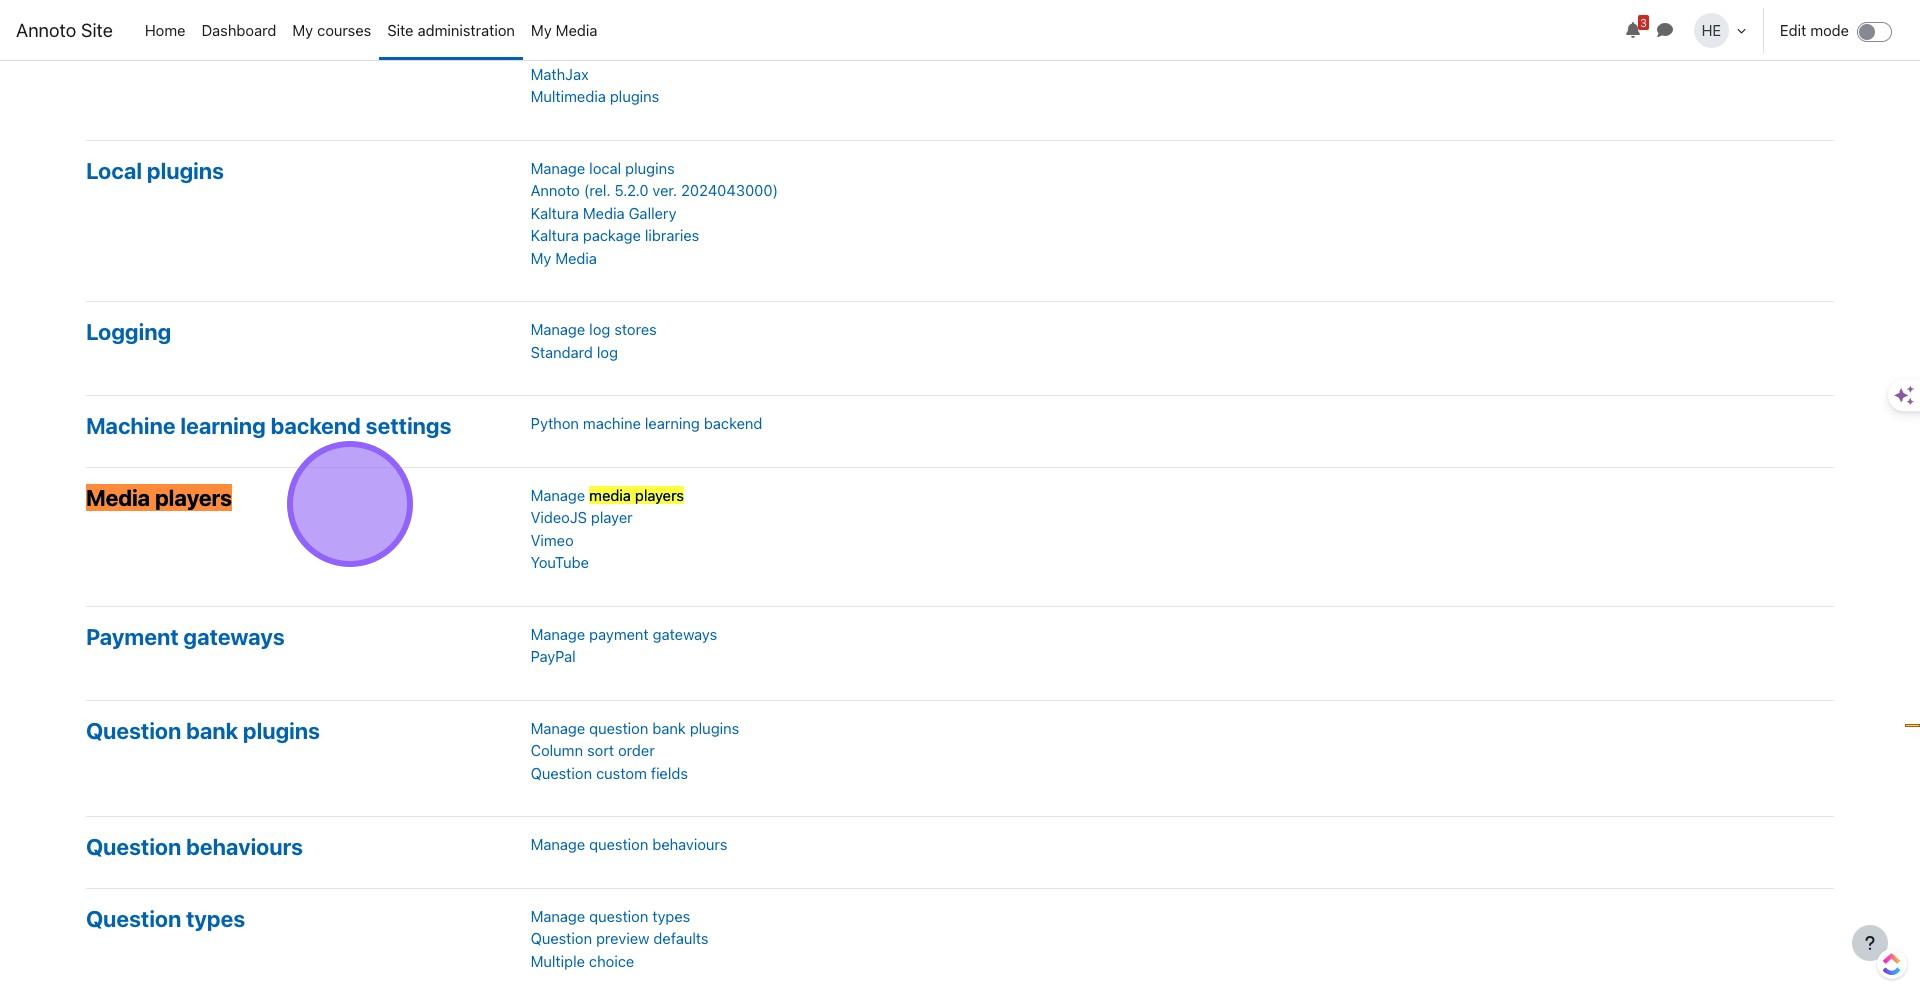
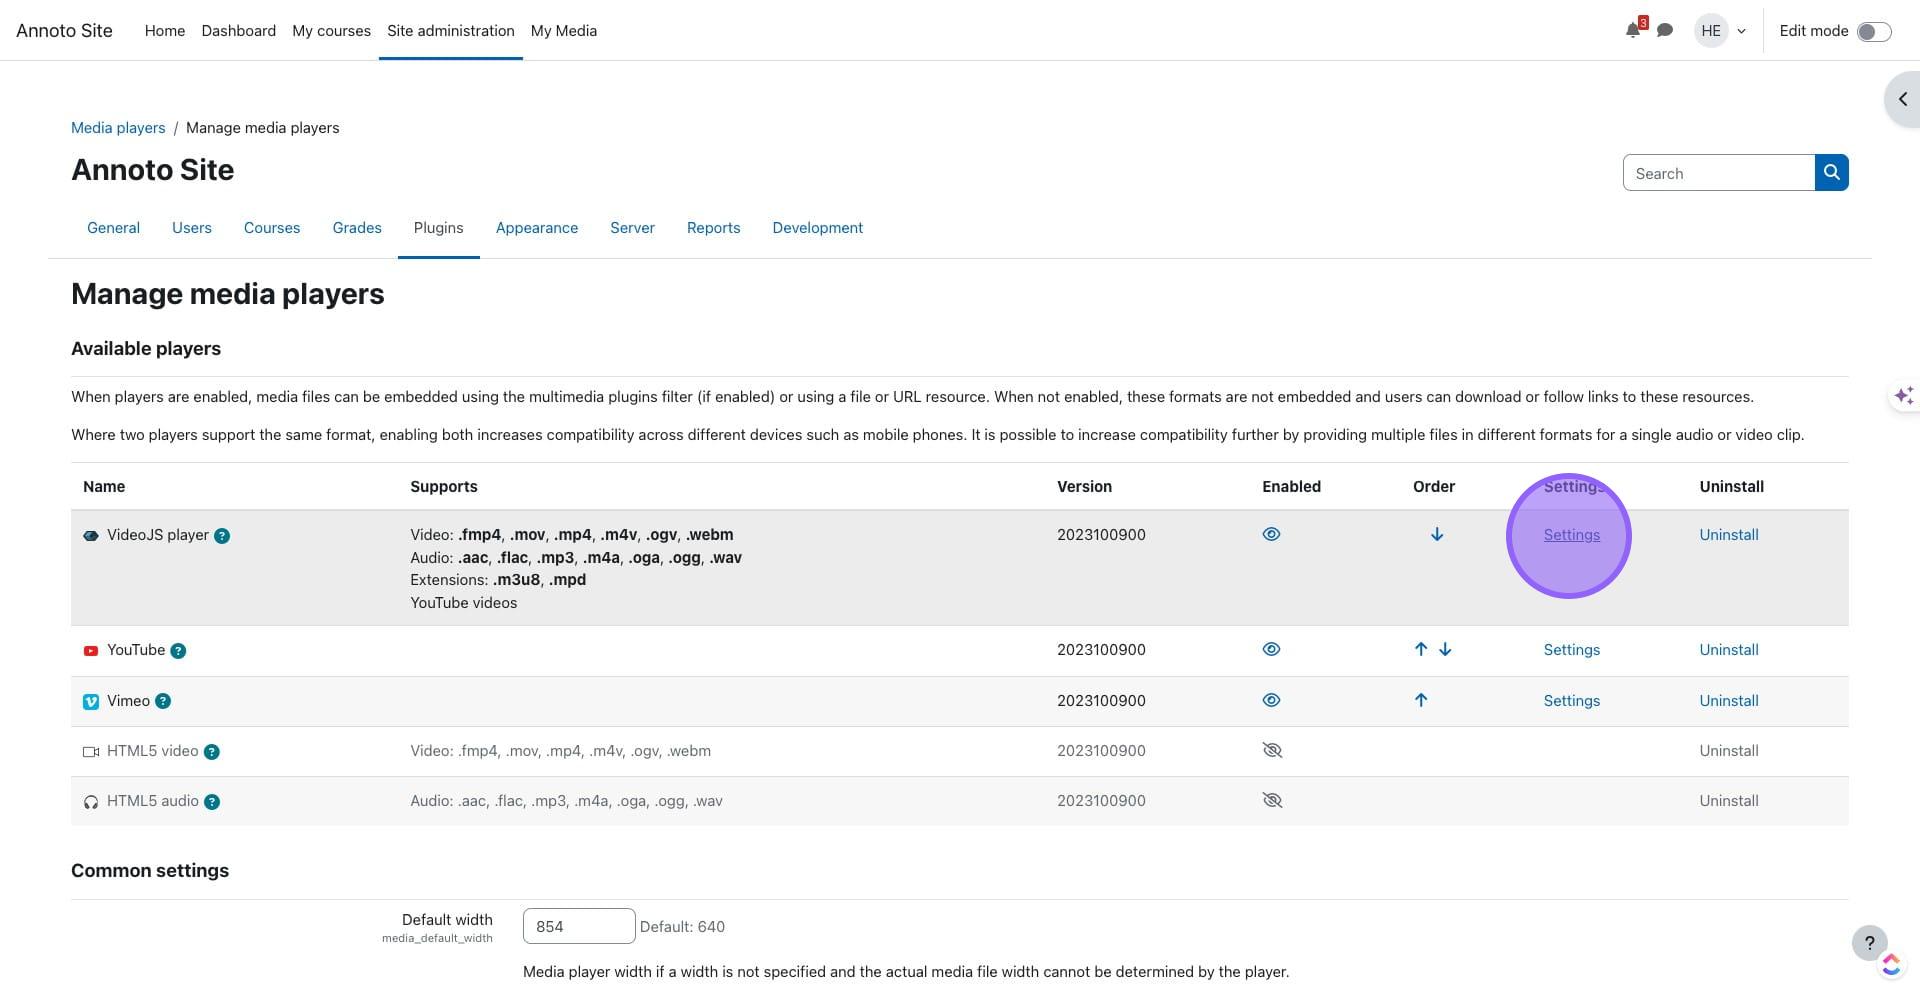
3. Click on "Media players"
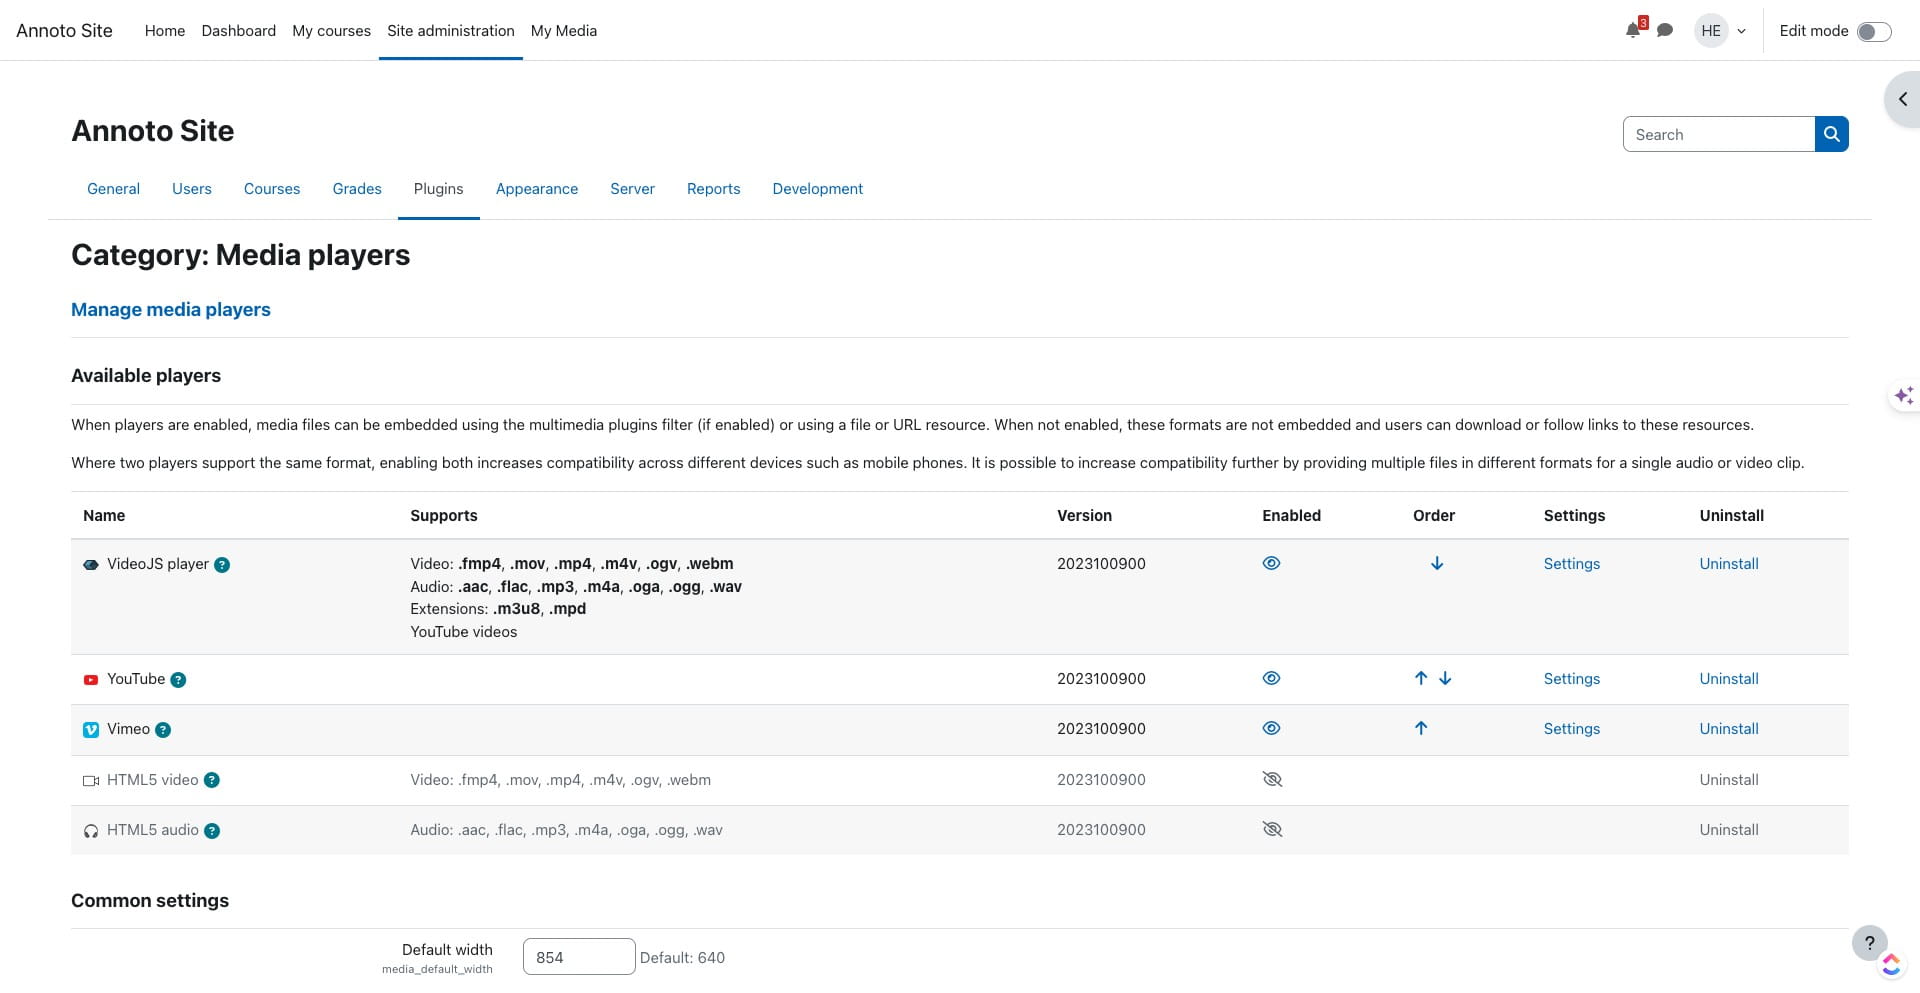
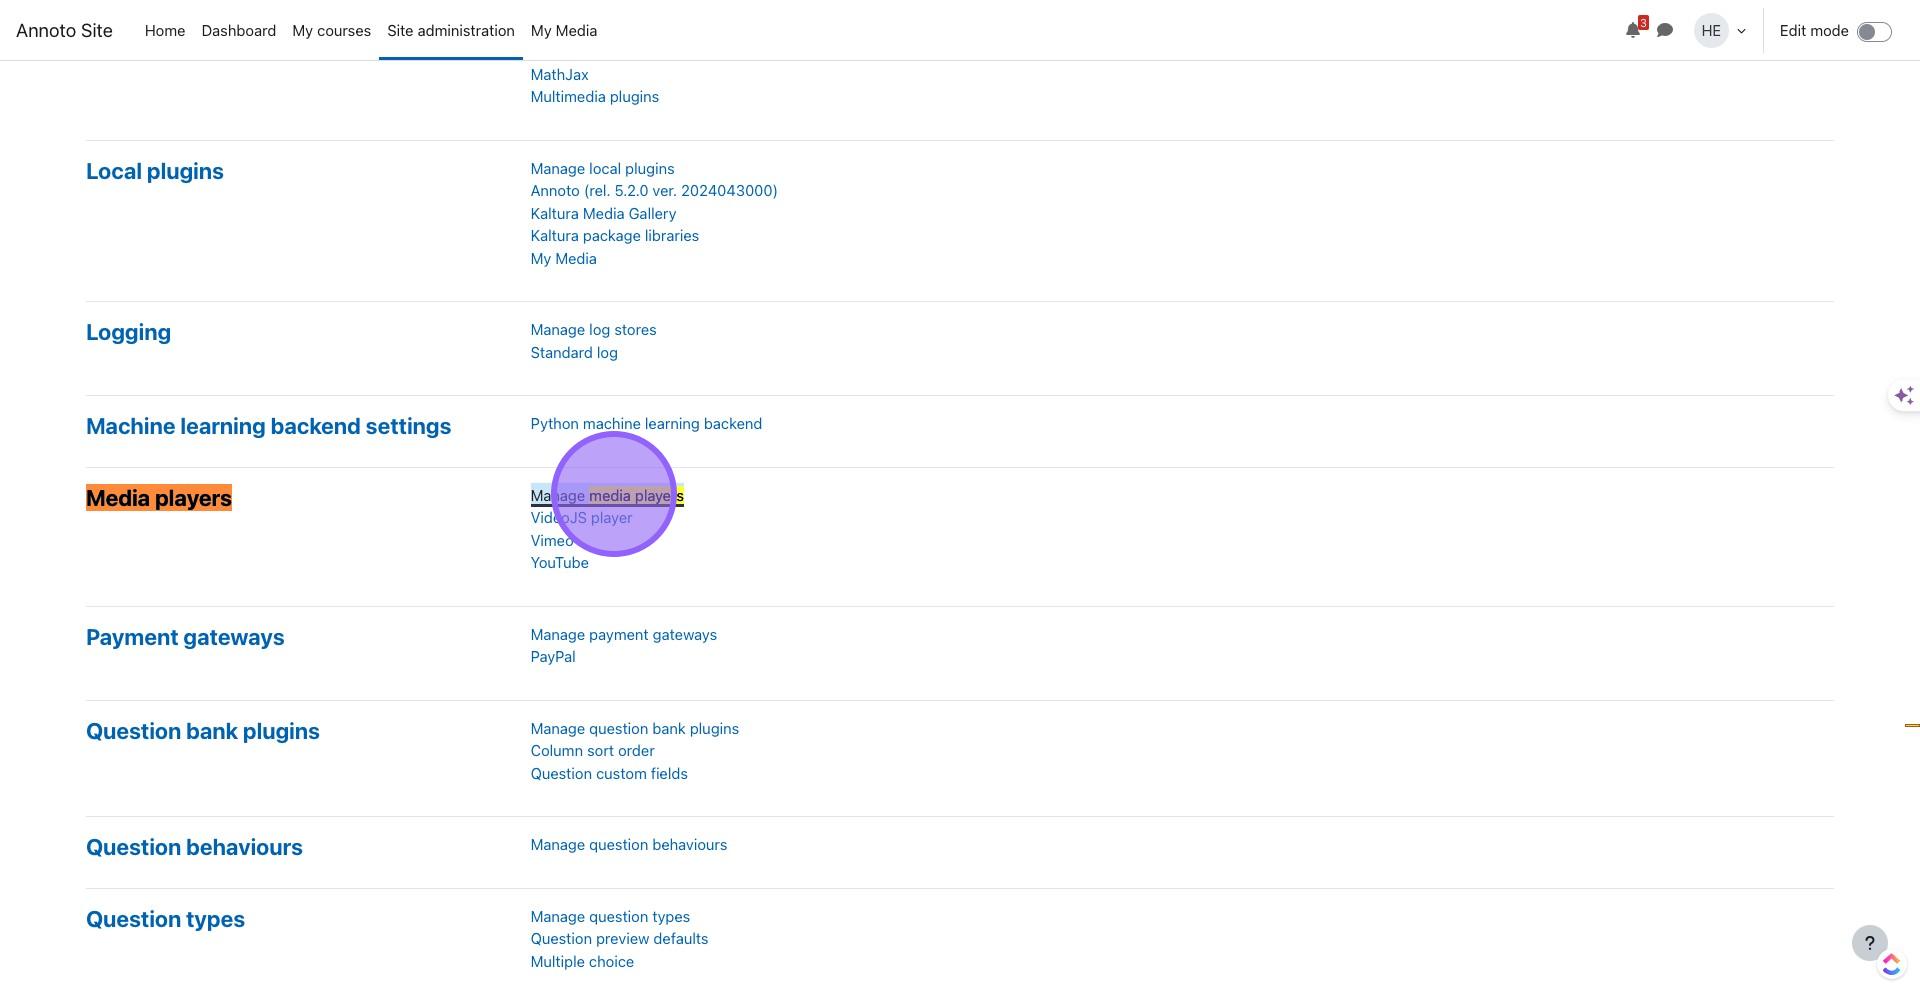
4. Click on "Manage media players"
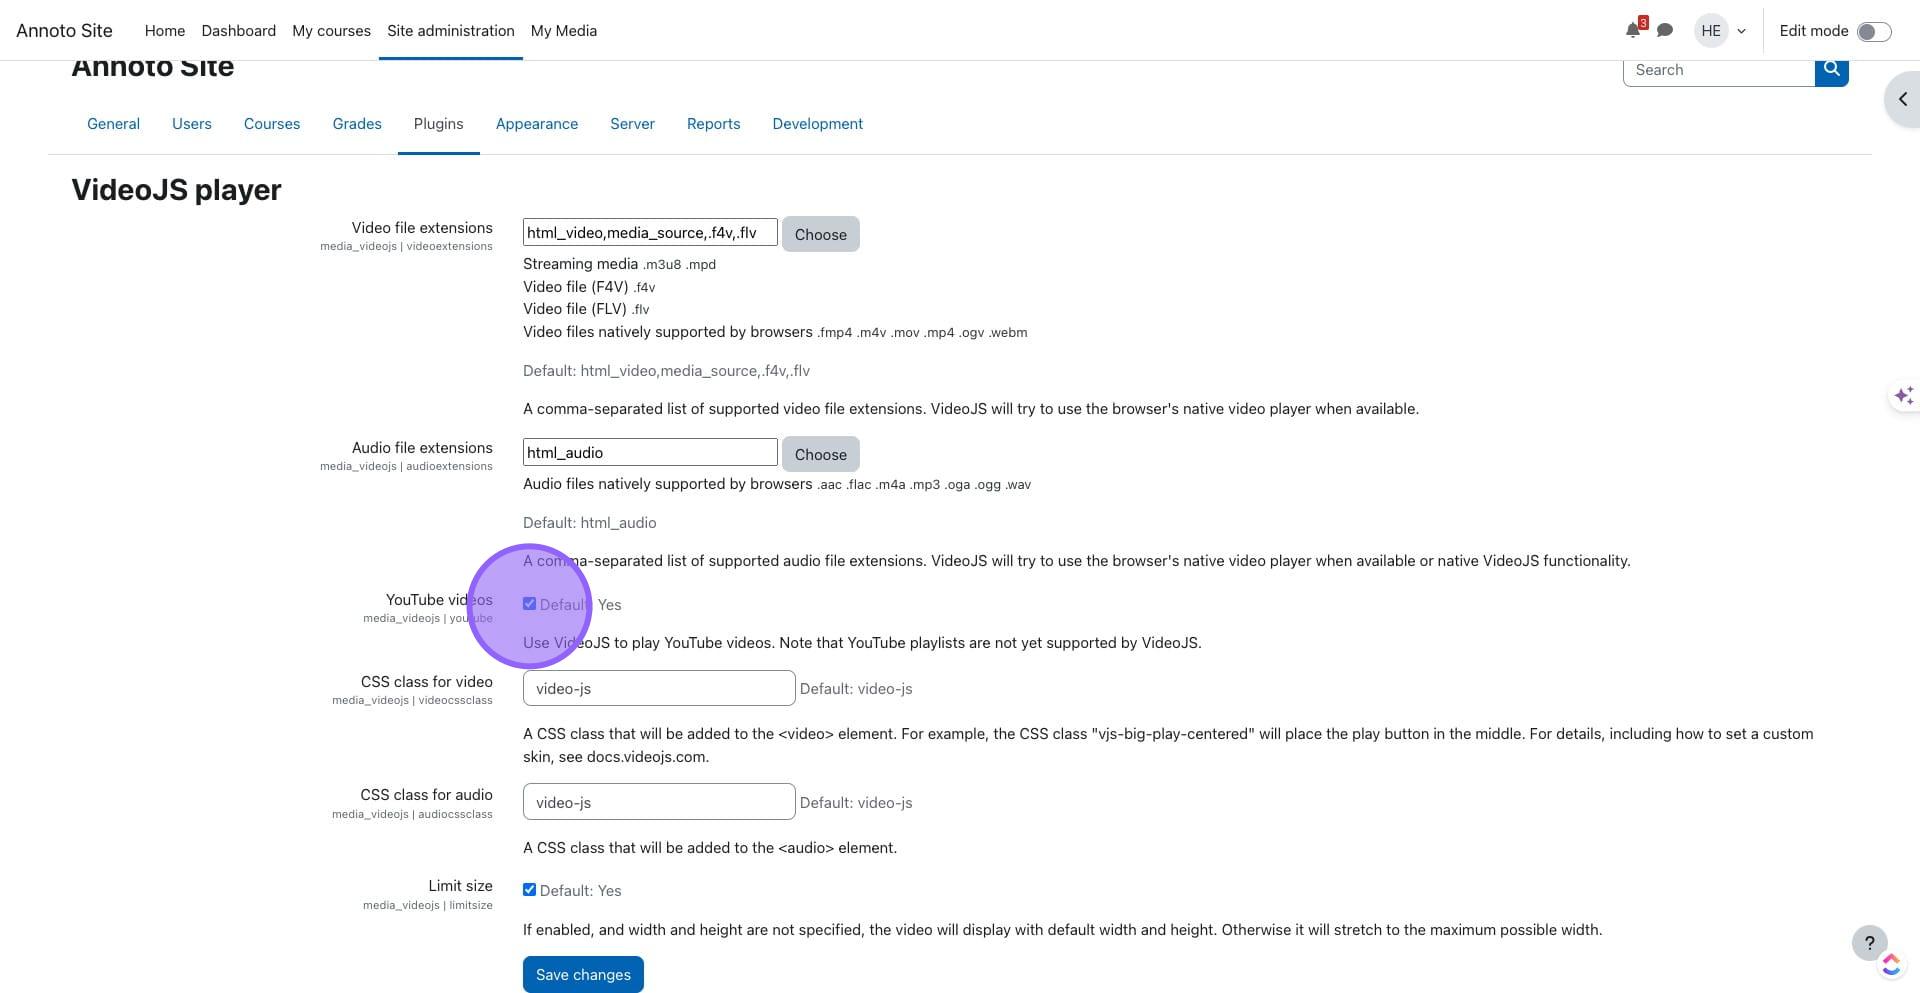
5. Click on "Settings"
6. Click to enable playing YouTube videos with the Moodle default player (if not already checked)
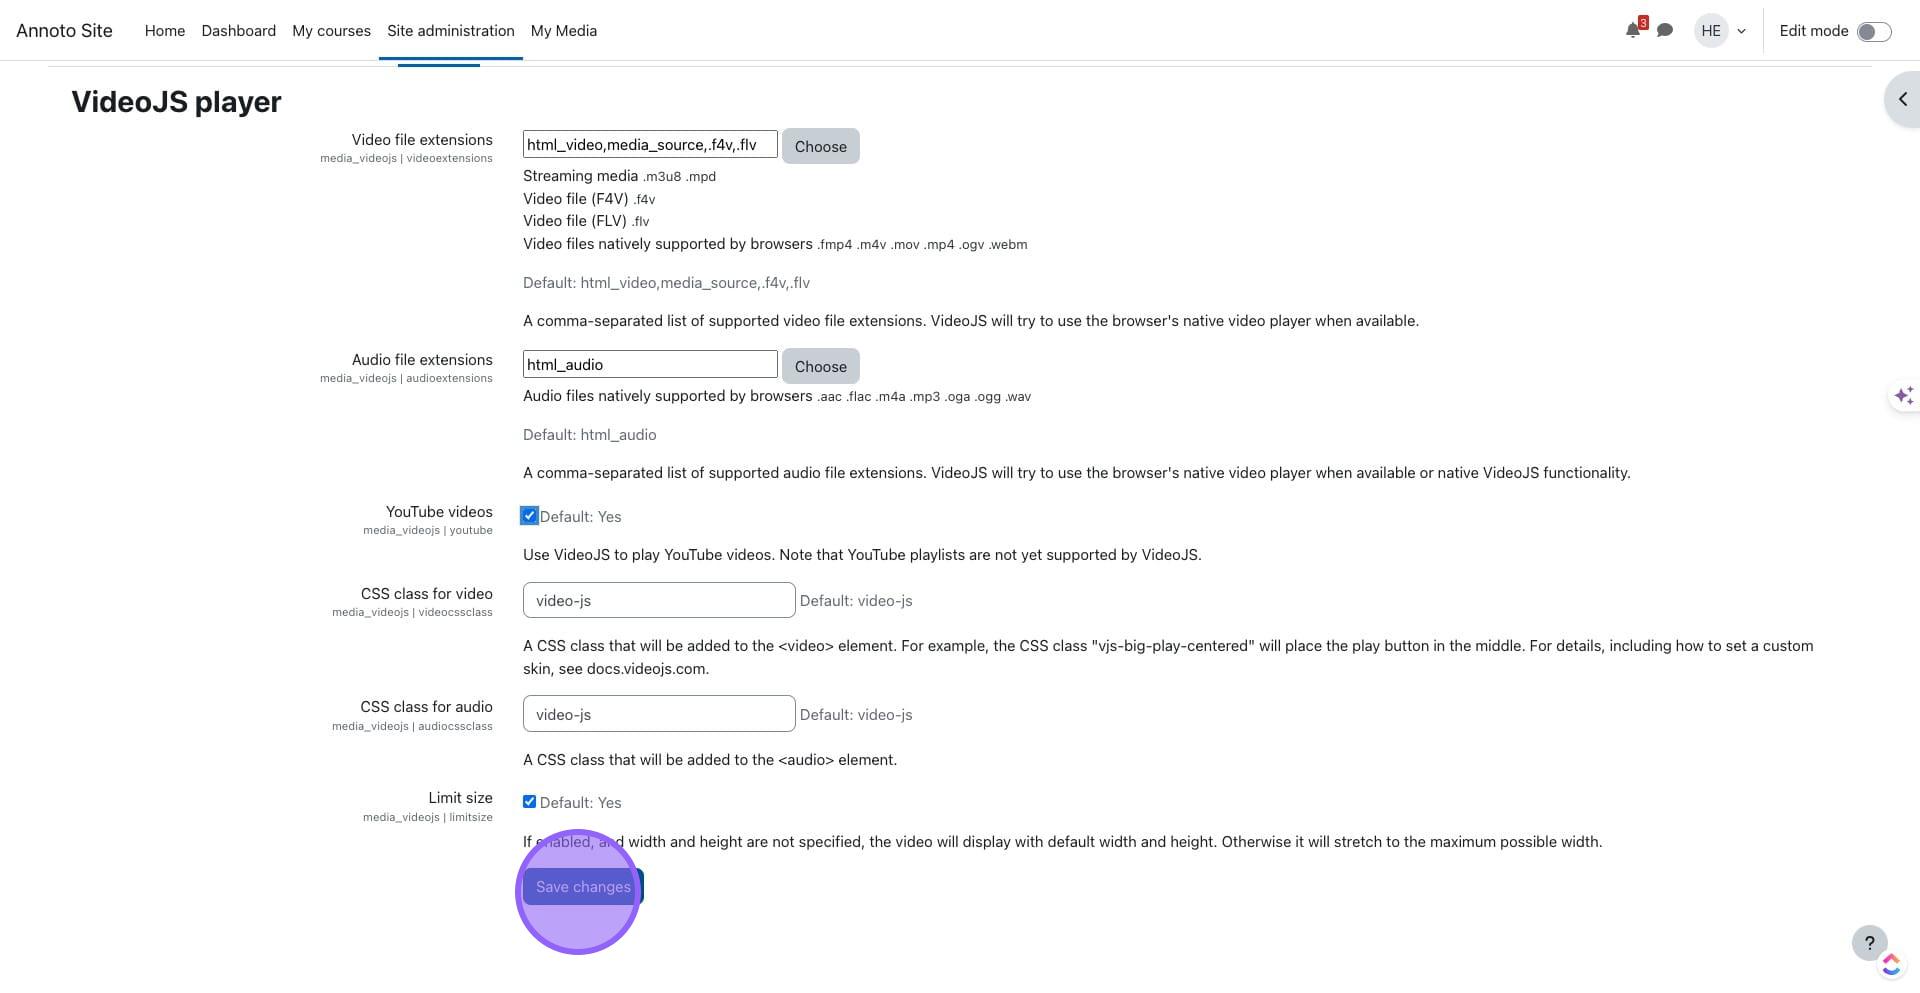
7. Click on "Save changes"
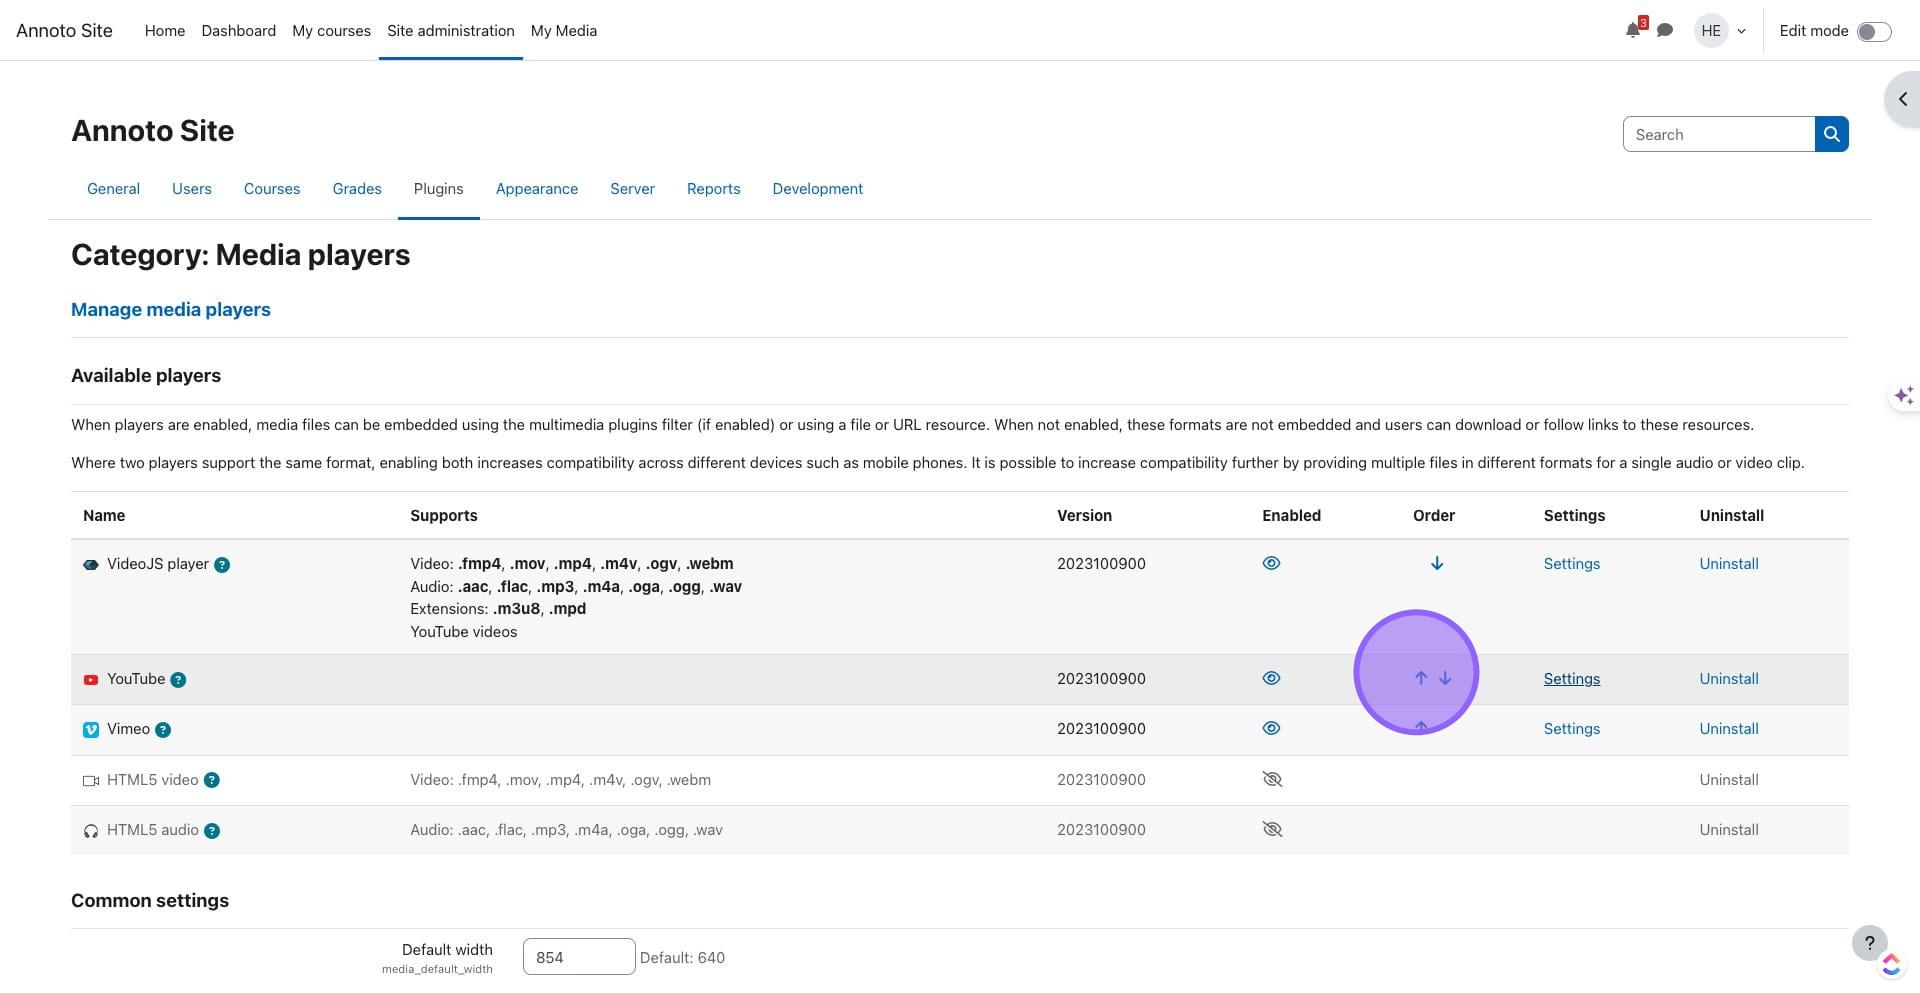
8. Set the order of the players at the table using the arrows in the "Order" column
9. Done 🚀
When using LTI in embedded mode with Moodle, the default iFrame height is very low.
The following describes how to increase the iFrame height
Download this plugin and install it in your Moodle
Moodle 3:
Moodle 4:
Login to your Moodle site as an admin and go to Administration > Site administration > Plugins > Install plugins.
Upload the ZIP file. You should only be prompted to add extra details (in the Show more section) if your plugin is not automatically detected.
If your target directory is not writeable, you will see a warning message.
Check the plugin validation report
Install the latest Annoto Local Plugin from:
For guidance on how to install a plugin in Moodle please refer to the following link:
EU:
US:
EU:
US:
If you need any additional information or have any questions, please contact us at
In order to learn more about all the wonderful things you can do with Annoto, visit:

This document offers an overview of the settings for the Annoto Moodle local plugin.
Annoto supports Moodle using local plugin that includes, among other things, the following capabilities:
Annoto In-video engagement widget
Automatic detection of the type of player running on the page and automatic adjustment of the type of player
The plugin currently supports the following video players/sources (the system supports more players. If needed can be added such as FlowPlayer, Wistia, etc.):
VideoJS
YouTube
Vimeo
H5P
jwPlayer
Kaltura
Wistia
HTML5
Single sign-on support
Ability to change Annoto appearance and layout settings
Ability to activate Annoto on :
All site
In a course level
In activity level
Once the plugin is installed, go to its settings screen and set its mode of operation according to the desired mode.
The plugin is installed with default settings that include settings for roles, and settings of how to run on a site.
API Key –Which was received from Annoto, this is provided per domain
SSO Secret –Which was received from Annoto, this is provided per domain
Annoto’s script URL - Provide Annoto's script URL (No need to change)
Deployment domain - Provide the region for the widgets. Please note that the widget data is bound to a specific region.
The Annoto local plugins add the Annoto Dashboard automatically to Moodle, and set the LTI activity.
Name, URL and Icon Fields do not need to be changed
Add to all the courses
If enabled, Annoto dashboard will be automatically added to all the courses.
If disabled the Annoto dashboard can be added manually from the “+ Add an activity or resource” on the desired course
Dashboard Manager Roles - Specify which role will trigger the addition of the Annoto dashboard to the course. For example: in the above image only Teacher and Manager roles will trigger the addition of the Annoto dashboard to the course.
Locale – If enable will set the language of Annoto per page and course based on Course and User preferences
2. Moderator Roles – Specify who is allowed to moderate discussions (only roles that at least include the following capabilities are available: local/annoto:moderatediscussion).
Enable overriding the Moodle Media Player settings for better user expirence
If enabled, Annoto activity completion will be available in the following Moodle activities:
Page
Label
H5P
hvp
Kaltura activity
Annoto Assignment
If you need any additional information or have any questions, please contact us at Annoto Support
